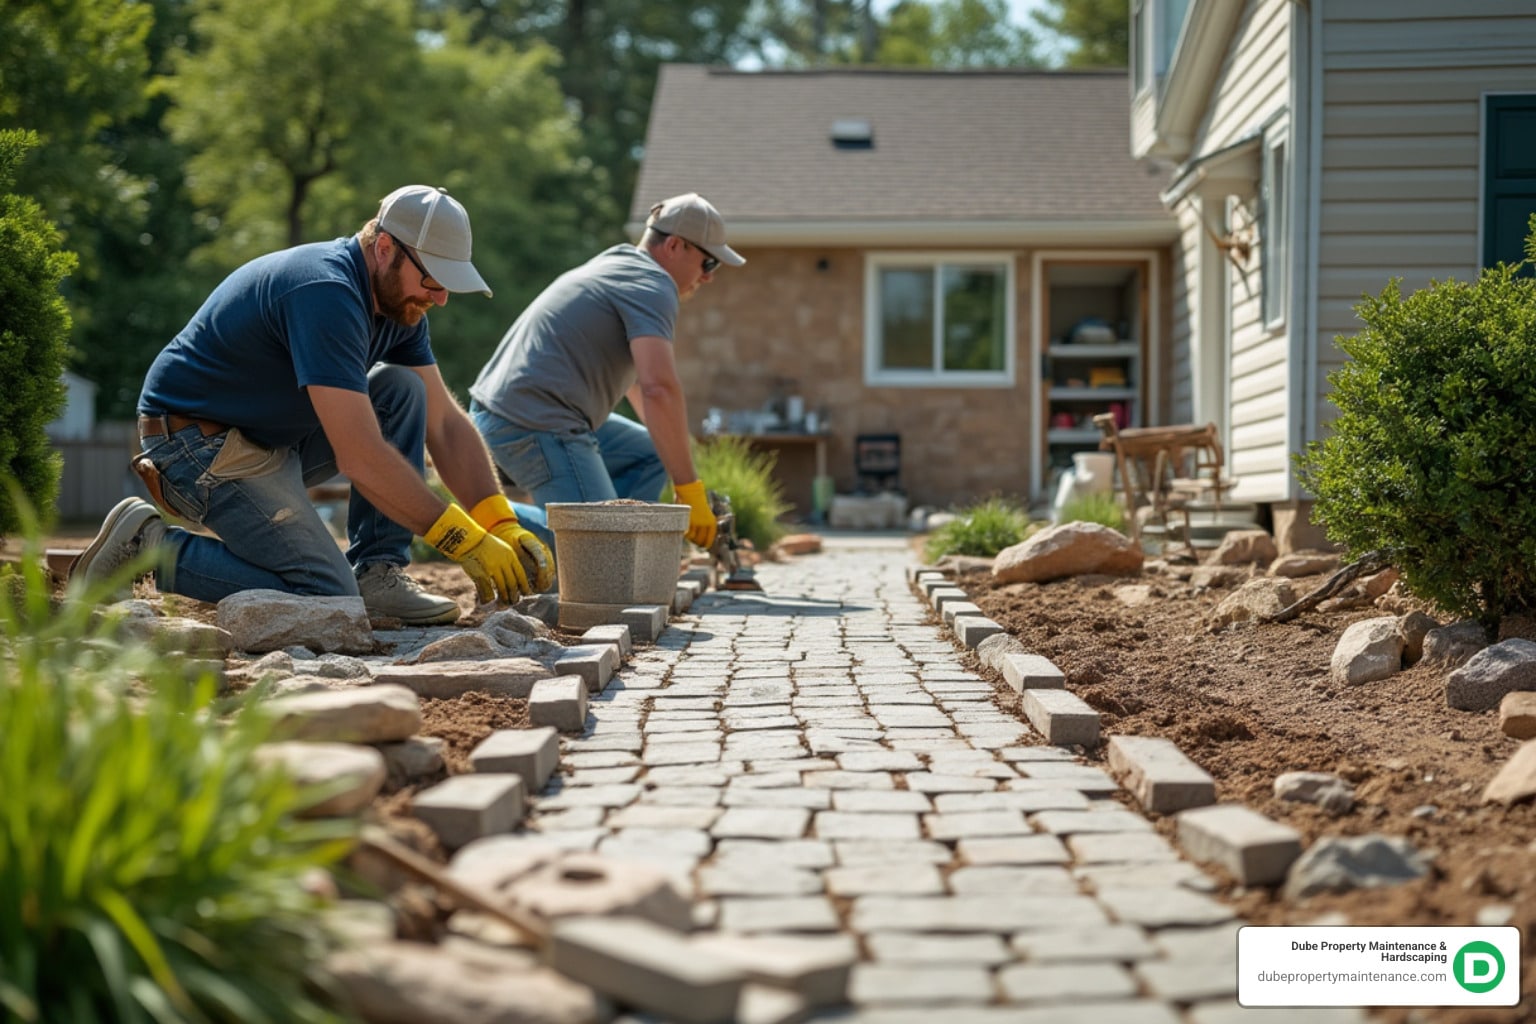
Patio and walkway construction transforms your outdoor space into a functional, beautiful area that adds real value to your home. Here’s what you need to know:
Essential Steps for Success:
– Plan & Design: Measure space, mark utilities, choose materials
– Prepare Base: Excavate 8-10″, add 6″ gravel + 1″ sand
– Install Materials: Lay pavers/stones with proper slope (¼” per foot)
– Finish Joints: Sweep polymeric sand, compact, and seal
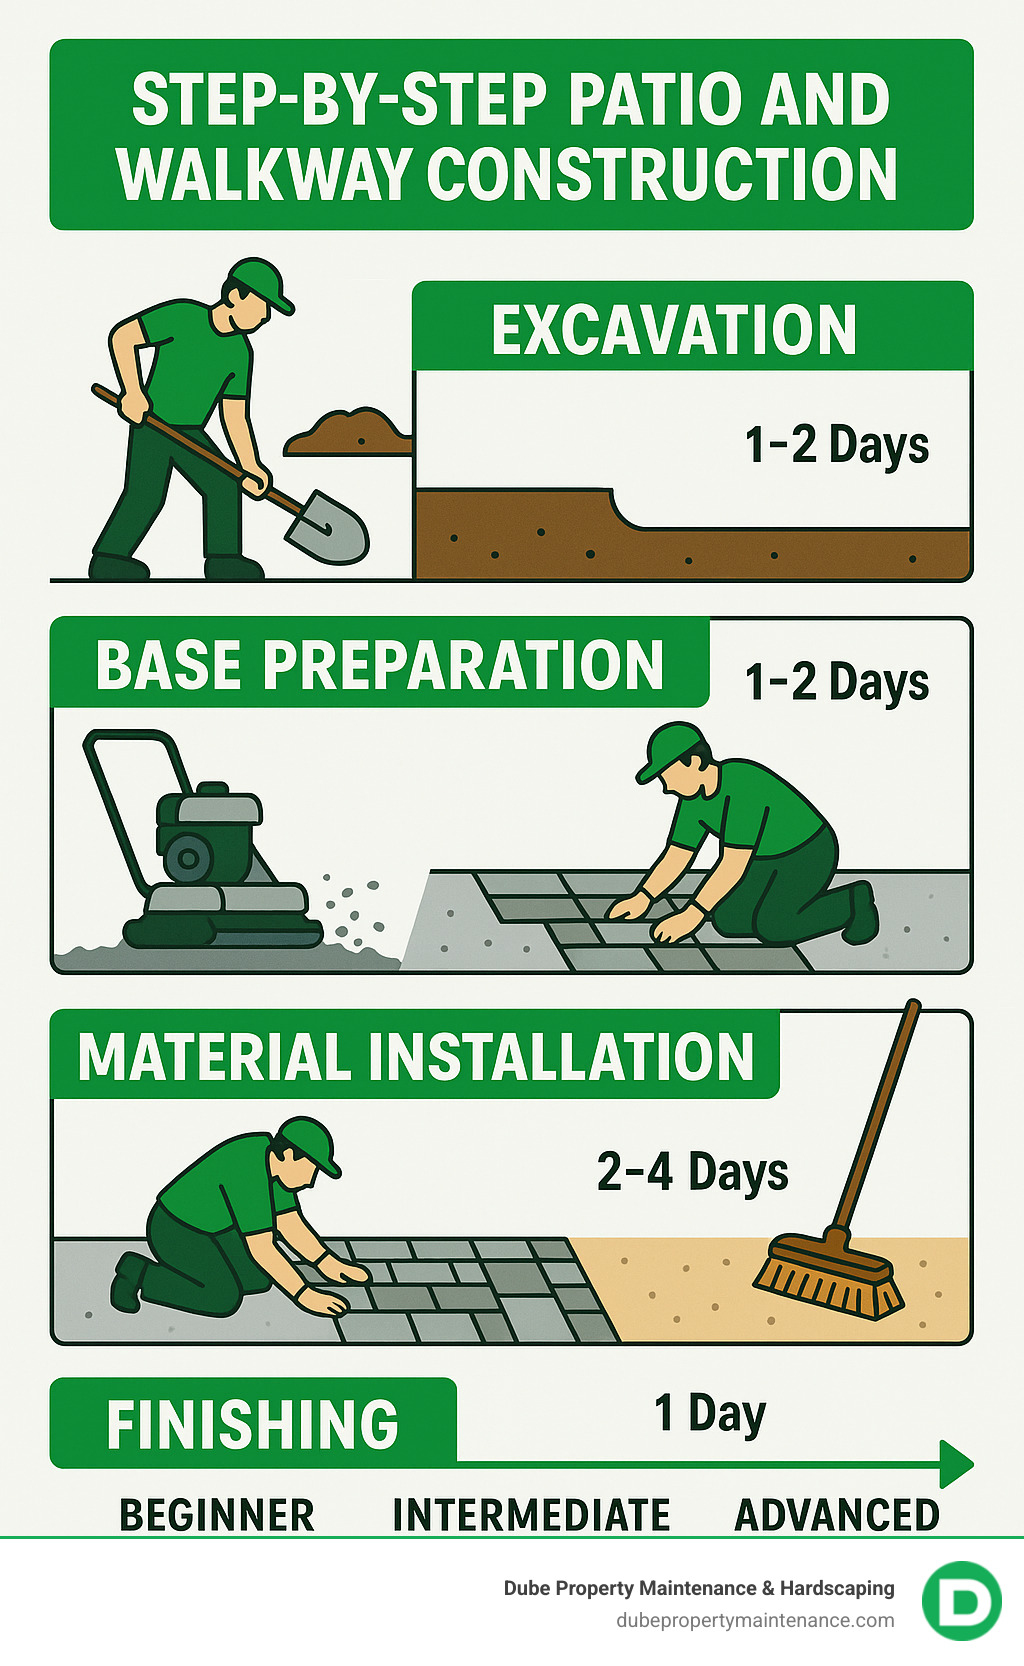
Timeline & Skill Requirements:
– Beginner Projects: 2-3 weekends for small walkways
– Intermediate Builds: 1 week for standard patios
– Advanced Features: Steps and curves add 1-2 days
As one experienced DIYer shared in their project recap: “Laying that walkway was one of our toughest DIY projects ever—there’s a reason crews are big and burly!” But don’t let that scare you off.
The key to success lies in proper preparation. A well-designed walkway should be at least 3 feet wide (4 feet is better), and your foundation needs that critical 6-inch gravel base plus 1-inch sand layer. Skip the prep work, and you’ll face settling, weeds, and safety issues later.
Average DIY costs range from $2.50 to $18 per square foot for materials, depending on your choices. That’s a fraction of professional installation costs, which can add 45% in labor fees.
Whether you’re connecting your driveway to your front door or creating a backyard entertaining space, this guide walks you through each step with the confidence that comes from proper planning and execution.
The difference between a patio and walkway construction project that becomes your weekend pride and joy versus one that haunts you every time you look outside? It all comes down to the planning phase. Think of this as your project’s blueprint—get it right, and everything else falls into place.
Start with the Basics: Know Your Space
Before you even think about patterns or materials, you need to become intimately familiar with your outdoor space. Walk the area with a measuring tape and really look at what you’re working with. Notice where water pools after a storm—that’s telling you about drainage issues you’ll need to address.
The most critical call you’ll make isn’t to the material supplier, though. Call 811 at least 48 hours before you dig. This free utility marking service could literally save your life (and definitely save you from accidentally cutting your neighbor’s cable line). Trust us, explaining to your spouse why the internet went out because you hit a utility line is not a conversation you want to have.
Getting Your Measurements Right
Here’s where many weekend warriors stumble: they underestimate the space they actually need. For walkways, 36 inches is your absolute minimum width for single-person traffic, but 48 inches feels so much better when you’re carrying groceries or walking with someone. If accessibility is important to your household, you’ll want that full 60 inches.
For patios, here’s a trick that’ll save you from buyer’s remorse: actually place your outdoor furniture in the planned space before you finalize dimensions. Walk around your imaginary dining set or lounge chairs. You’ll quickly find whether your planned 12×12 patio needs to bump up to 14×16 to feel comfortable.
The Slope That Saves Your Foundation
Every surface needs to slope away from your house at ¼ inch per foot—no exceptions. This isn’t just a suggestion; it’s what keeps water from pooling against your foundation. A simple way to visualize this: for every 4 feet of patio, one end should be 1 inch lower than the end closest to your house.
Your new hardscape should also complement your home’s style. A colonial home looks fantastic with traditional brick patterns, while a modern house might call for clean concrete pavers in geometric layouts. More info about Paver Patio Design Ideas can help you visualize different approaches that work with your home’s architecture.

The Garden Hose Test
For curved pathways, grab your garden hose and lay out your design. It’s the perfect tool—flexible enough to show you gentle curves, visible enough to step back and evaluate, and easy to adjust until the flow feels natural. For straight edges, stakes and string work beautifully, but double-check your corners are actually square using the old 3-4-5 triangle method.
Now comes the fun part: deciding how your patio and walkway construction will actually look. The pattern you choose affects both the final appearance and how challenging your installation will be.
Running bond is your best friend if you’re new to this. Think of it as laying bricks in a wall—each row is offset by half a paver. It’s forgiving, looks clean, and works for both straight paths and gentle curves. Plus, you’ll do minimal cutting, which means less time wrestling with a masonry saw.
Herringbone creates that sophisticated zigzag pattern you see in high-end installations. It’s incredibly stable under foot traffic, making it perfect for driveways or high-use areas. The trade-off? You’ll spend more time cutting edge pieces and laying each paver takes a bit more thought.
Basketweave gives you that woven appearance by alternating pairs of pavers. Here’s why beginners love it: small spacing variations don’t show as much, so your inevitable “learning curve” moments won’t be as obvious in the finished product.
Pinwheel looks complex but is actually quite straightforward—four rectangular pavers surround a square center piece. You’ll need two different paver sizes, but the installation rhythm is easy to find once you get started.
For something more organic, consider stepping-stone layouts with irregular flagstone. These work beautifully for garden paths and are much more forgiving than geometric patterns. If your measuring isn’t perfect or your cuts are slightly off, it just adds to the natural charm.
The key is matching your pattern choice to both your skill level and your timeline. A simple running bond might not seem as exciting as herringbone, but if it means you’ll actually finish the project this weekend instead of having a half-completed walkway haunting your yard, it’s the right choice.
Let’s be honest—patio and walkway construction isn’t the cheapest weekend project you’ll tackle, but it’s one of the most rewarding. Getting your tool and material list right from the start saves you multiple trips to the hardware store and keeps your project on track.
The Tool Reality Check
You probably own some of the basics already: shovel, rake, measuring tape, and a trusty wheelbarrow. But there are a few specialized tools that make the difference between a frustrating weekend and a successful build.
The plate compactor is your most important rental. Don’t try to substitute a hand tamper for anything larger than a small walkway—your back will thank you later. Plate compactor rental typically runs $40-60 per day, and it’s worth every penny for proper base compaction.
For laying pavers, you’ll need a rubber mallet (never use a regular hammer), a PVC screed pipe for leveling sand, and edge restraints to keep everything in place. If you’re cutting pavers, rent a masonry saw—trying to cut with a regular circular saw creates dangerous dust and poor cuts.
Understanding Your Material Choices
Here’s where costs can really vary. Average DIY material costs range from $2.50 to $18 per square foot, but premium materials can push that range up to $50+ per square foot.
| Material | Cost Range* | Pros | Cons |
|---|---|---|---|
| Concrete Pavers | $2.25-$11/sq ft | Uniform, many colors, easy to replace | Can look artificial |
| Brick | $4-$10/sq ft | Classic look, ages well | Limited color options |
| Flagstone | $3-$18/sq ft | Natural beauty, unique patterns | Irregular thickness, more cutting |
| Permeable Pavers | $5-$15/sq ft | Eco-friendly, reduces runoff | Higher initial cost |
*These are average costs based on internet data and not actual costs for Dube Property Maintenance & Hardscaping.
Concrete pavers offer the most bang for your buck if you’re working with a tight budget. They’re uniform in thickness, which makes installation faster, and they come in dozens of colors and textures. Brick gives you that timeless appeal but limits your color palette. Flagstone creates stunning natural patterns but requires more skill to install because each piece is unique.
Permeable options are gaining popularity for good reason—they help manage stormwater runoff and often qualify for municipal rebates. The higher upfront cost often pays for itself in reduced drainage issues.
We’ve seen too many DIYers skip safety gear and regret it later. Patio and walkway construction involves heavy materials, loud machinery, and plenty of dust.
Eye protection isn’t optional when you’re cutting pavers or working with polymeric sand—those tiny particles can cause serious irritation. Hearing protection becomes essential once you fire up that plate compactor or masonry saw. Trust us, your neighbors will appreciate the shorter work sessions too.
Don’t underestimate good knee pads. You’ll spend hours kneeling while setting pavers, and concrete is unforgiving. Quality work gloves protect against cuts from sharp edges and prevent blisters during the heavy lifting phases.
Getting your material quantities right prevents delays and waste. For your foundation, plan on 6 inches of base gravel—either Class 5 or crushed stone works well. Top that with 1 inch of bedding sand (washed concrete sand, not play sand).
Order 10% extra pavers beyond your calculated square footage. You’ll need extras for cuts around edges, and having matching pavers for future repairs saves headaches later. Polymeric joint sand costs more than regular sand but prevents weeds and ant hills between your pavers.
Edge restraints might seem like an optional expense, but they’re what keep your beautiful patio from slowly spreading apart over time. Install them every 2 feet around the perimeter—it’s much easier than rebuilding sections later.
Landscape fabric under your gravel base helps with long-term weed control, though opinions vary on whether it’s worth the extra cost and installation time.
Here’s where the rubber meets the road in patio and walkway construction—and honestly, where most weekend projects succeed or fail. Get this foundation right, and your patio will still look great in twenty years. Skip steps here, and you’ll be redoing everything next spring.
The Deep Dig: Why 8-10 Inches Matters
You’ll need to excavate deeper than you think—8-10 inches below your finished surface level. Here’s the breakdown that surprised me the first time I calculated it:
Your 6-inch gravel base gets compacted down to about 4-5 inches of solid foundation. Add 1 inch of bedding sand for leveling, plus 2-3 inches for your actual pavers. Suddenly that “simple” walkway requires moving a lot more dirt than expected.
Start by marking your excavation area clearly—spray paint works great for this. Remove all sod and organic material first. Pro tip: if you’re planning to expand your lawn elsewhere, keep that sod slightly moist and replant within a few days. It’s free grass that’s already adapted to your soil.
Building Your Foundation Layer by Layer
Here’s where patience pays off big time. Install your gravel base in two 3-inch lifts instead of dumping all 6 inches at once. I know it seems like extra work, but trust the process.
Compact each lift thoroughly with your plate compactor, overlapping each pass by about 3 inches. The sound changes when the gravel is properly compacted—you’ll hear it become more solid and less “crunchy.” This creates a stable foundation that won’t settle and create those annoying low spots later.
Don’t forget to install landscape fabric over your compacted base if you want extra weed protection. Overlap seams by 6-8 inches and secure with landscape staples. It’s not absolutely necessary, but it makes maintenance much easier down the road.
Getting the Slope Right (It’s More Important Than You Think)
Maintain that ¼-inch per foot slope away from your house religiously. Use a long level and actually measure this—eyeballing it leads to water problems that are expensive to fix later.
For longer spans, consider renting a transit level or using a water level for accuracy. The investment in getting this right the first time saves you from digging up settled pavers or dealing with ice dams in winter.

If your project involves complex grading or drainage concerns, More info about Walkway Installation covers the technical details that can save you from costly mistakes.
Most weekend warriors should stick with the dry-laid (sandset) method, and here’s why it makes sense for patio and walkway construction projects.
Why Dry-Laid Works for DIYers
Pavers rest on a sand bed over your gravel base—no mortar, no mixing concrete, no panic about working time. The benefits are huge for beginners: easier installation, individual pavers can be replaced if damaged, and the system handles freeze-thaw cycles better in cold climates.
Plus, if your measurements aren’t perfect (and whose are on their first project?), the dry-laid method is much more forgiving. You can adjust, re-level, and fine-tune as you go.
When Wet-Laid Makes Sense
The mortar-set method creates pavers permanently bonded to a concrete slab. It requires more skill, costs more, and takes longer—but it’s the right choice for extreme weather conditions or areas that get heavy vehicle traffic.
For most residential patios and walkways, though, the dry-laid approach offers the best balance of durability and ease of installation. Save the wet-laid method for when you’re ready to tackle more advanced projects.
When your yard isn’t perfectly flat (and whose is?), you have several smart options for managing elevation changes in your patio and walkway construction.
Working with Gentle Slopes
For slopes under 5%, you can usually follow the natural grade with your walkway. Just make sure you’re still maintaining proper drainage away from structures, and consider using longer pavers perpendicular to the slope for extra stability.
Managing Moderate Slopes
When you’re dealing with 5-15% slopes, it’s time to create terraced sections with retaining edges. Install steps every 7-8 inches of rise, using wall blocks or thick stones for step risers. This creates a more comfortable walking experience and prevents erosion.
Tackling Steep Terrain
For slopes over 15%, you’ll need formal steps with 7-inch rise and 10-12 inch tread depth. Dig back into the slope about 10 inches for each step and compact gravel behind each riser for stability.
Here’s when it makes sense to consider professional consultation: complex grading, retaining walls over 3 feet, or sites with drainage issues. Sometimes the cost of getting expert advice upfront saves you from expensive do-overs later.
Here’s where your careful preparation transforms into something beautiful. The actual patio and walkway construction installation is surprisingly satisfying—like putting together a giant outdoor puzzle where every piece has its perfect place.
Start with Your Border Strategy
Always begin with your border pavers first. Think of them as the frame of a picture—they establish your pattern and keep everything else in line. Use a string line to keep that first row laser-straight, and check frequently with a level. Trust me, any wobbles here will haunt you later when you’re trying to make everything else fit.
The Art of Laying Pavers
Set each paver gently on your sand bed without dragging it across the surface. Dragging creates ridges in your carefully leveled sand, which means uneven pavers and a bumpy finished surface. Instead, lower each paver straight down and give it a gentle tap with your rubber mallet to seat it properly.
Maintain consistent gaps of about 1/8 inch between pavers. Your eyes will naturally spot inconsistent spacing, so take your time here. Work from one corner outward to avoid walking on your pristine sand bed—every footprint means more leveling work.
Cutting Pavers Like a Pro
You’ll definitely need to cut edge pieces to fit, and this is where many weekend warriors get nervous. A wet masonry saw gives the cleanest cuts, but don’t stress if you only have a chisel and hammer for small adjustments. The key is working slowly and wearing your safety glasses—rushing leads to broken pavers and potentially broken fingers.
Mark your cut line clearly and score it first if you’re hand-cutting. Sometimes a slightly imperfect cut fits better than you’d expect, especially if it’s going against a house foundation or garden bed.
Edge Restraints: The Unsung Heroes
Install edge restraints every 2 feet along your perimeter. These plastic or metal strips prevent your beautiful patio and walkway construction from slowly spreading apart over time. Drive the stakes or spikes into the ground firmly, making sure the edging sits just below your paver surface where it won’t be visible.
Skip this step, and you’ll be re-doing your project in a few years when frost heave and settling create gaps you could lose a shoe in.

The Magic of Polymeric Sand
This is where everything comes together—literally. Polymeric sand contains binding agents that activate with water, creating a flexible mortar that locks your pavers in place while still allowing for natural movement.
Sweep the sand into all joints using a push broom, working diagonally across the surface to fill gaps completely. Remove any excess sand from the paver surfaces before the next step—leftover sand will leave a hazy film when activated.
Lightly mist the entire area to activate those binding agents. Don’t flood it—you want a gentle, even moisture that penetrates the joints without washing out the sand. Allow everything to cure according to the manufacturer’s instructions, usually 24-48 hours.
More info about Building a Paver Patio offers additional tips for achieving those professional-looking results that make your neighbors wonder if you hired a crew.
Environmental consciousness is becoming increasingly important in patio and walkway construction, and the good news is that sustainable options often look better than traditional approaches.
Permeable Pavers for Water Management
These specialized pavers allow water to drain through the surface rather than running off into storm drains. They cost more initially—typically 20-30% above standard pavers—but they help prevent flooding and reduce strain on municipal water systems. Many communities now offer rebates for permeable installations.
Gravel Joints for Natural Drainage
Instead of traditional sand, consider using decorative gravel between flagstones. This creates excellent drainage while adding visual texture and interest. Choose gravel that complements your stone color—warm gray stones pair beautifully with golden pea gravel, while cool blue-gray flagstone looks stunning with darker charcoal chips.
Recycled Materials with Character
Reclaimed brick and recycled concrete pavers offer instant character while reducing environmental impact. When shopping for reclaimed bricks, test them by knocking two together—good pavers ring like a bell, while soft or damaged bricks make a dull thud. This simple test can save you from buying materials that won’t stand up to freeze-thaw cycles.
Rain Garden Integration
Design your walkway to direct water toward planted areas that can absorb and filter runoff naturally. A slight grade toward rain gardens or bioswales turns your hardscape into part of your property’s natural water management system. It’s beautiful, functional, and helps recharge groundwater rather than overwhelming storm drains.
Once your patio and walkway construction project is complete, you’ll want to keep it looking its best for years to come. The good news? Proper maintenance is surprisingly straightforward and won’t eat up your weekends.
Your Year-Round Care Routine
Think of paver maintenance like caring for your car—a little attention throughout the year prevents big problems later. Spring is perfect for your annual deep clean and damage assessment. Grab a stiff brush and rinse away winter’s debris, then walk the entire surface looking for any pavers that may have shifted during freeze-thaw cycles.
Summer brings growing season, which means keeping an eye on weeds trying to sneak between joints. A quick spray with organic herbicide or hand-pulling keeps things tidy. This is also when you’ll notice if any joint sand has washed away—totally normal after heavy rains.
Fall preparation involves clearing leaves promptly (they can stain if left wet) and double-checking that your drainage is working properly before winter arrives. Winter care is mostly about using the right ice melt—magnesium chloride is much gentler on pavers than rock salt.
When to Refresh Your Joints
Expect to re-sand joints every 3-5 years. Don’t panic when you notice some sand washing away—this is completely normal, especially in the first year as everything settles. Heavy rainfall, foot traffic, and seasonal expansion all gradually work the sand loose.
When you do re-sand, sweep out loose debris first, then apply new polymeric sand following the same process you used during installation. It’s a half-day job that makes everything look fresh again.
Sealer: Optional but Nice
Sealers can improve color and provide some stain protection, but they’re definitely not required for a durable installation. If you’re dealing with a light-colored stone that shows stains easily, or you just love that “wet look,” sealing every 3-4 years might be worth it. Just remember that sealed surfaces need more careful cleaning—no pressure washing at high settings.
Making Your Hardscape Part of the Bigger Picture
The most successful outdoor spaces feel intentional and connected. Your new patio or walkway should work seamlessly with everything else happening in your yard.
Lighting transforms everything after dark. Low-voltage LED path lights can be added anytime, and solar options eliminate any wiring headaches. Space them about 8-10 feet apart for even illumination without creating a runway effect.
Fire pit planning opens up three-season entertaining possibilities. If you’re thinking about adding one later, make sure your paved area is large enough and check local fire codes for required clearances from structures and property lines.
Garden bed transitions create visual flow when you use consistent edging materials. The same stone or metal edging that defines your walkway can outline planting beds, tying everything together beautifully.
More info about Paver Walkway and Steps shows how different hardscape elements can work together in a cohesive design.
We’ve seen plenty of weekend warrior projects over the years, and the same issues pop up repeatedly. Learning from others’ mistakes saves you time, money, and frustration.
Insufficient compaction is the big one. That plate compactor rental might seem expensive for a weekend, but skipping proper base compaction almost always leads to settling, uneven surfaces, and genuine trip hazards within a year or two. Take the time to compact each gravel lift thoroughly—your future self will thank you.
Ignoring proper drainage seems minor until you’re dealing with ice sheets or water pooling against your foundation. That ¼-inch per foot slope isn’t a suggestion—it’s essential for long-term success and safety.
Skipping edge restraints might save a few dollars upfront, but without them, pavers gradually spread apart over time. What starts as tiny gaps becomes unstable walking surfaces and weed highways.
Cutting corners on base thickness is another false economy. A 4-inch base instead of the recommended 6 inches might seem like a reasonable compromise, but in freeze-thaw climates, it often leads to complete failure within a few seasons.
Using regular sand instead of polymeric sand for joints is like using duct tape for a permanent repair. Regular sand washes out with every heavy rain, leaving gaps for weeds and creating ongoing maintenance headaches.
The truth is, most of these mistakes happen when DIYers get tired or try to rush the final steps. Take breaks, follow the process, and remember that quality patio and walkway construction is about patience as much as technique.
These are the questions we hear most often from homeowners tackling their first patio and walkway construction project. Let’s address the big ones that can make or break your weekend warrior success.
If you’re only renting one piece of equipment, make it a plate compactor—hands down. This machine is absolutely critical for proper base preparation and gives you that professional-quality compaction that’s nearly impossible to achieve by hand.
Here’s why the compactor tops our list: You’ll spend hours hand-tamping what a compactor does in minutes, and the results simply aren’t comparable. A properly compacted base prevents settling, eliminates future trip hazards, and ensures your patio and walkway construction project lasts for decades rather than seasons.
The masonry saw often comes in second for tool rentals, but here’s a money-saving tip: many paver suppliers will cut your pieces for a small fee if you bring them a cutting list. For small adjustments, a hammer and chisel work fine—just take your time and wear safety glasses.
A plate compactor rental typically runs $40-60 per day, which is a fraction of what you’d pay to buy one. Most weekend projects need the compactor for just one or two days—once for base preparation and again for final paver seating.
Getting your material calculations right saves both money and frustration. Nothing’s worse than running out of pavers when you’re in the zone, or having a huge pile of leftover gravel cluttering your yard.
For pavers, start with basic math: length times width gives you square footage. Then divide by the coverage area of one paver (your supplier should provide this number). Always add 10% extra for cuts, breakage, and future repairs. Trust us on this—that extra 10% isn’t waste, it’s insurance.
Base material calculations follow a similar pattern. For your 6-inch gravel base, multiply your square footage by 0.5 to get cubic feet needed. For the 1-inch sand layer, multiply by 0.083. Most suppliers think in cubic yards, so divide your cubic feet by 27 to convert.
Here’s a real-world example: A 12×16 foot patio needs about 3.5 cubic yards of gravel and 0.6 cubic yards of sand. Don’t worry if math isn’t your strong suit—most reputable suppliers will run these calculations for you when you provide your measurements.
Pro tip: Bring a sketch with dimensions when you visit the supply yard. The staff there see these projects daily and can often spot potential issues or suggest helpful modifications.
We love DIY spirit, but some projects really do call for professional expertise. Knowing when to call in the pros can save you money, time, and potential safety issues.
Size matters in patio and walkway construction. Projects over 500 square feet often require specialized equipment and experience that make professional installation more cost-effective. The labor savings from DIY start to diminish when you’re looking at weeks of weekend work.
Complex grading and drainage issues are another red flag for DIY projects. If your site has significant slope changes, drainage problems, or you’re working near your home’s foundation, professional assessment is worth the consultation fee. Water damage from poor drainage can cost thousands more than professional installation.
Structural elements like retaining walls over 3 feet high often require engineering and permits. Many municipalities require professional installation for structural hardscaping, and your homeowner’s insurance may have requirements too.
Time constraints also factor into the decision. If you need your outdoor space ready for a specific event, professionals can complete in days what might take you months of weekends.
At Dube Property Maintenance & Hardscaping, we often work with homeowners who started DIY projects and realized they needed professional help to finish properly. There’s no shame in recognizing when a project has grown beyond your comfort zone—we’re always happy to step in and help complete your vision.
There’s something deeply satisfying about stepping back and admiring a patio and walkway construction project you’ve completed with your own hands. That first morning coffee on your new patio, or watching guests naturally flow from your driveway to your front door along the walkway you built—these moments make all those hours of digging and compacting feel worthwhile.
Your weekend warrior project represents more than just improved curb appeal. You’ve added genuine value to your home while creating outdoor spaces that will serve your family for decades. The physical challenge, creative problem-solving, and skill-building aspects of patio and walkway construction offer rewards that go far beyond the finished product.
The Foundation of Success
Looking back at successful DIY projects, certain principles consistently separate the winners from the do-overs. Preparation truly is everything—that 6-inch gravel base isn’t just a suggestion, it’s your insurance policy against settling and cracking. The homeowners who skip this step to save time or money almost always regret it within the first year.
Drainage deserves respect too. That seemingly minor ¼-inch per foot slope prevents major headaches down the road. Water always finds a way, and you want to control where it goes rather than let it surprise you during the first heavy rain.
Quality materials make the difference between a project you’re proud to show off and one you’re constantly maintaining. Spending a bit more on polymeric sand and proper edge restraints pays dividends in reduced maintenance and lasting appearance.

The Numbers That Matter
Your DIY investment typically ranges from $2.50 to $18 per square foot for materials, with premium options reaching $50+ per square foot for luxury materials. These are average costs based on internet data and not actual costs for Dube Property Maintenance & Hardscaping. Professional installation generally adds 45% to material costs, making the DIY route attractive for budget-conscious homeowners who enjoy hands-on projects.
Safety remains non-negotiable throughout your project. Those safety glasses, knee pads, and hearing protection aren’t just recommendations—they’re what keep your weekend project from becoming a trip to urgent care.
Before You Dig
Call 811 before you break ground—this free utility location service prevents dangerous and expensive accidents. It’s required by law and takes just a phone call to potentially save your life and your project budget.
When Professional Help Makes Sense
Sometimes the smartest DIY decision is knowing when to call in professionals. If you find yourself overwhelmed by complex grading, dealing with drainage issues near your foundation, or simply running out of weekends to complete the work, that’s not failure—that’s wisdom.
More info about patio installation services shows how Dube Property Maintenance & Hardscaping can step in to complete your vision. We serve communities throughout Massachusetts and New Hampshire, and we’ve helped many homeowners who started DIY projects and needed professional expertise to finish them properly.
The Long View
Whether you complete this as a solo DIY trip or partner with professionals for parts of the project, you’re creating something lasting. Your patio and walkway construction project improves your home’s functionality, increases its value, and gives your family years of outdoor enjoyment.
All price figures mentioned are broad internet averages—actual project costs vary significantly by region, material quality, and project complexity.
The best part? Every time you use your new outdoor space, you’ll remember the satisfaction of building something beautiful and functional with your own hands.