Installing pavers is a fantastic way to improve your outdoor spaces, from creating charming walkways to establishing inviting patios. This seemingly straightforward DIY project can lift the look of your property while also proving functional. Whether you’re working with natural stone, concrete, or brick pavers, the process is about careful preparation, precise installation, and finishing touches that ensure longevity.
Here’s a quick overview for installing pavers:
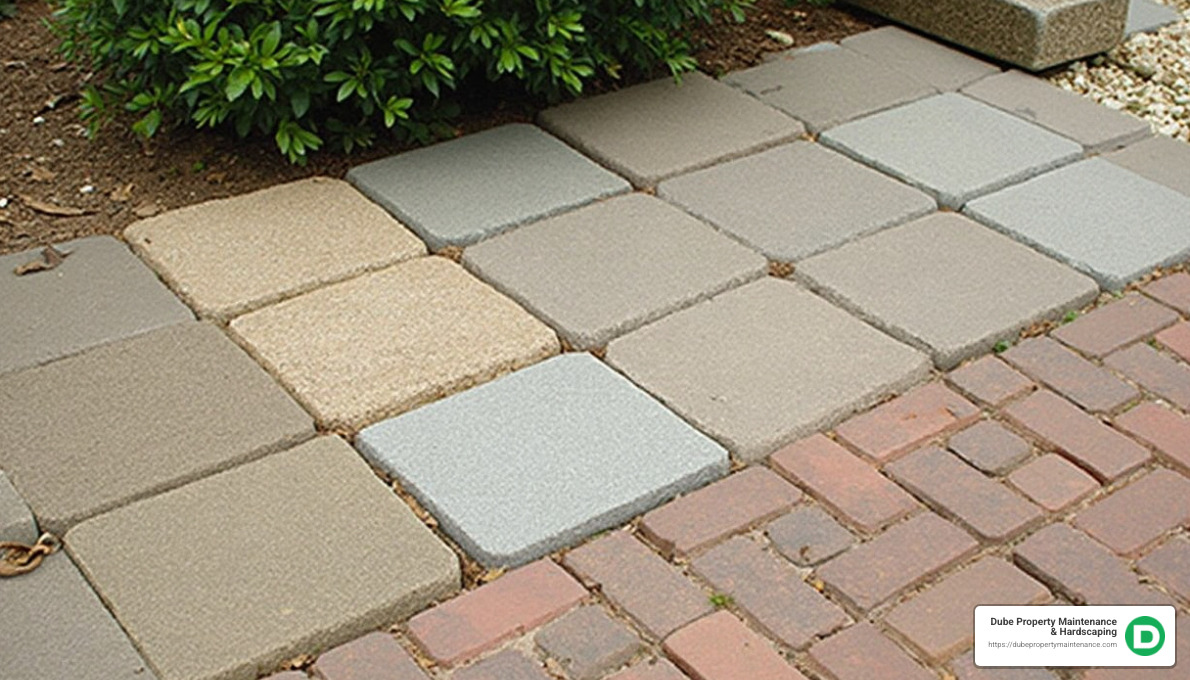
Paver installation offers versatile outdoor solutions that blend beauty with durability. By choosing the right material and following the correct steps, you can create stunning driveways, paths, or patios that withstand the elements and add value to your property.

Easy installing pavers word list:
– base for pavers
– interlocking concrete pavers
– paver stone walkway ideas
When planning your paver project, a solid strategy is key. Let’s break it down into two main components: choosing the right pavers and calculating the materials needed.
Selecting the right paver material is crucial for both aesthetics and functionality. Here’s a quick guide to help you decide:
Accurate calculations ensure you have enough materials without overspending. Here’s how to get it right:
By planning carefully and selecting the right materials, your paver project will not only look great but also stand the test of time. Next, let’s dive into preparing the site for your paver installation.
Before you start laying your pavers, prepare the site properly. This involves excavating the space and installing the base. Let’s break down these steps to ensure a sturdy and long-lasting paver installation.
Soil Removal and Depth Measurement
Start by marking the perimeter of your project area with stakes and string. Use these markers to guide your excavation. You’ll need to dig down about 4-6 inches, depending on the type of pavers and base material you plan to use. For example, if you’re installing a patio, a depth of 6 inches is typically recommended to accommodate 4 inches of gravel and 1 inch of sand.
Using a Weed Barrier
Before laying down the base material, consider installing a weed barrier. This fabric helps prevent weeds from growing through your pavers, ensuring a clean and low-maintenance surface.
Base Material and Compaction
A strong base is crucial for the stability of your pavers. Spread a 4-inch layer of gravel evenly across the excavated area. Use a plate compactor or hand tamper to compact the gravel. This step is vital for preventing shifting and settling over time.
Maintaining the Slope
Proper drainage is essential to prevent water pooling and damage. As you compact the base, ensure a gentle slope away from any structures, like your house. A slope of about 1 inch every 8 feet is generally recommended. This will direct water away, protecting both your pavers and your home.
By following these steps, you’ll create a solid foundation for your pavers. Proper site preparation is key to a successful installation, ensuring your outdoor space remains beautiful and functional for years to come. Next, we’ll cover the exciting part—laying the pavers!
Once your site is prepped, it’s time to start laying the pavers. Begin by spreading a 1-inch layer of bedding sand over the compacted gravel base. This sand layer helps to level the pavers and provides a cushion that allows for minor adjustments.
Starting Point and Pattern Selection
Choose a starting point that allows you to work your way out without stepping on the prepared sand. A corner or along the longest straight edge often works best. As you lay each paver, consider the pattern you want to achieve. Popular patterns include running bond, herringbone, and basketweave. These patterns not only improve the visual appeal but also add structural integrity to the installation.
Edge Restraints
Edge restraints are critical in maintaining the integrity of your paver project. They prevent the pavers from shifting and spreading over time. Install these restraints along the perimeter of your project area before you start laying pavers. You can use plastic, metal, or concrete edging, depending on your preference and budget.
As you approach the edges of your project area, you’ll likely need to cut some pavers to fit. Cutting pavers can be done using a masonry saw or a guillotine-style splitter. Both tools provide clean cuts, but a masonry saw, which can be rented from a local tool rental company, is often preferred for its precision.
Polymeric Sand for Stability
After all the pavers are laid and cut to fit, sweep polymeric sand into the joints. This sand helps lock the pavers in place and prevents weed growth. Fill the joints about halfway before compacting the pavers, as this will help keep them from shifting during the compaction process.
By following these steps, you’ll ensure a smooth and professional-looking paver installation. Next, we’ll discuss finishing touches to improve the durability and appearance of your outdoor space!
Once all pavers are laid, it’s time to ensure they are secure and stable. Use a plate compactor to compact the pavers. This machine vibrates and presses the pavers into the bedding sand, helping to lock them in place and create a level surface. Make sure to compact the entire area at least twice for the best results.
After compacting, applying a sealant is crucial. A good sealant improves the color of the pavers and provides a protective layer against stains and weather damage. Apply the sealant using a roller or sprayer, ensuring even coverage. Allow the sealant to dry completely before using the area, which usually takes 24 to 48 hours.
To keep your pavers looking pristine, regular maintenance is key. Sweeping sand into the joints periodically will help maintain stability. Use a soft-bristled broom to sweep the sand, which prevents dirt buildup and supports the pavers.
Cleaning the surface is also important. Rinse the pavers with water to remove dirt and debris. For stubborn stains, use a mild detergent and a gentle brush. Avoid using harsh chemicals, as they can damage the pavers and the environment.
Prevent water pooling by ensuring proper drainage. Check for any low spots where water might collect and fill them with sand or additional pavers. This will not only protect the pavers but also prevent slipping hazards.
Regular inspection for any cracks or shifts will help you address small issues before they become bigger problems. If you notice any shifting, add more sand to the joints and recompact the area.
By following these maintenance tips, your paver installation will remain beautiful and functional for years to come. Now, let’s move on to some frequently asked questions about installing pavers!
The foundation of your paver project is crucial for its longevity and durability. According to Scott Johnson, a landscape and design consultant, the best practice is to remove about 6 inches of dirt, especially if your soil is clay-like. This creates space for a road base layer followed by a layer of dense sand. The road base provides a solid foundation, while the sand ensures a smooth and level surface for the pavers.
Yes, edge restraints are essential for keeping your pavers in place. As Anthony “TC” Williams, a professional landscaper, emphasizes, without proper edging, pavers can shift over time. Edge restraints can be made from various materials, including plastic, metal, or concrete. They work with the gravel and sand base to maintain the integrity of the installation, ensuring that your pavers remain aligned and stable.
When installed correctly, pavers are remarkably stable, much like the ancient Roman roads that have stood the test of time. The key to maintaining their position lies in installation techniques and regular maintenance. Initially, sweeping polymeric sand into the joints helps lock the pavers together. Over time, periodic sand sweeping is recommended to fill any gaps and prevent movement. This simple maintenance step ensures that your pavers stay in place and continue to look great.
Installing pavers is a rewarding project that improves outdoor spaces. By understanding the importance of a strong base, edge restraints, and regular maintenance, you’ll ensure a successful and long-lasting installation. Up next, we’ll wrap up our comprehensive guide on installing pavers.
As we wrap up our comprehensive guide on installing pavers, let’s take a moment to highlight the benefits of working with a professional team like Dube Property Maintenance & Hardscaping. Based in Methuen, MA, we offer a full range of services, ensuring that your outdoor spaces are not only beautiful but also functional and durable.
Our team is committed to providing comprehensive outdoor solutions custom to your specific needs. Whether you’re looking to install a new walkway, patio, or driveway, we have the expertise and the tools to bring your vision to life. Our professional team is dedicated to delivering high-quality results, using the best materials and techniques to ensure that your paver project stands the test of time.
Choosing the right partner for your landscaping and hardscaping needs can make all the difference. At Dube Property Maintenance & Hardscaping, we pride ourselves on our attention to detail and our commitment to customer satisfaction. We understand the importance of a well-executed project and the impact it can have on your home’s curb appeal and overall value.
Ready to transform your outdoor space? Explore our walkway installation services to get started on your next project. Our professional team is here to help you every step of the way, ensuring a seamless and enjoyable experience from start to finish.
