Property Maintenance
& Hardscaping
Headquarters In
Methuen, MA

From Ground to Grill: How to Install an Outdoor Kitchen

How to Install an Outdoor Kitchen: Top 10 Easy Tips


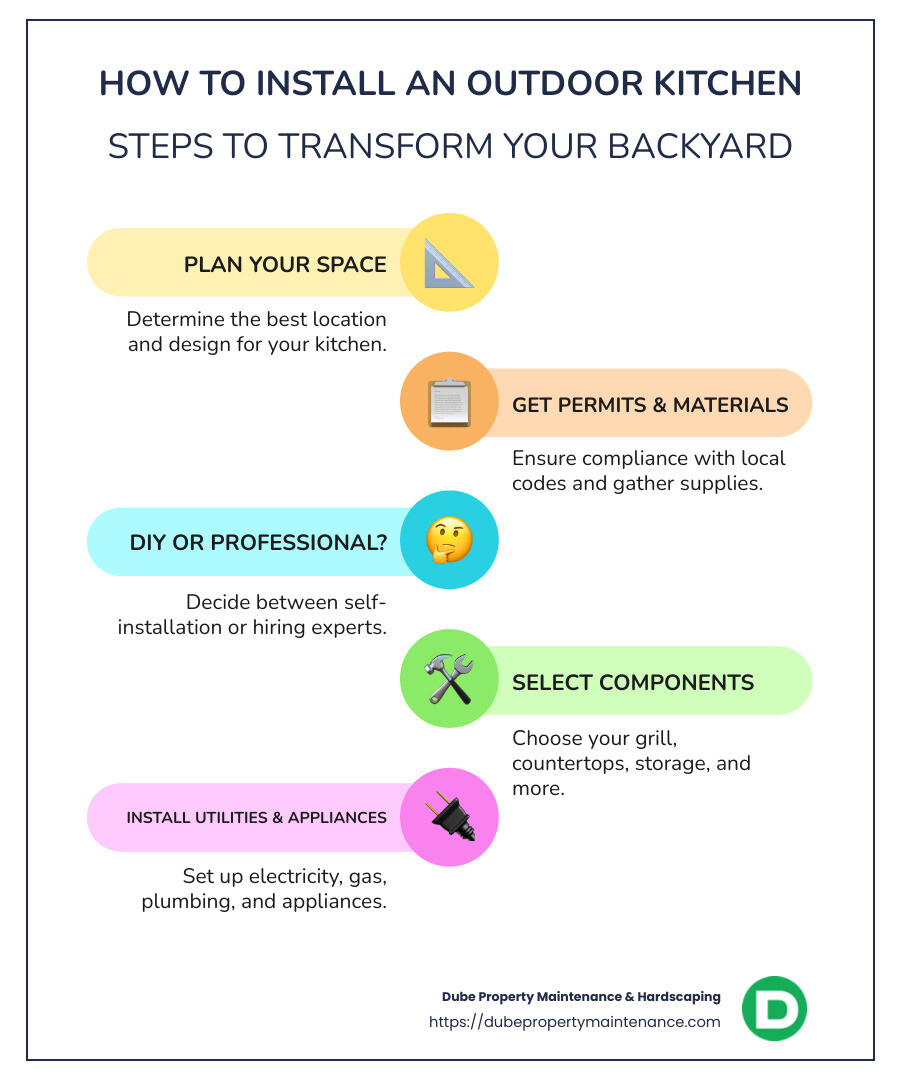
How to install an outdoor kitchen has become a popular query among homeowners seeking to lift their outdoor spaces. Here’s a quick outline on how to get started:

  1. Plan your space and layout – Determine the best location and design.
  2. Gather necessary permits and materials – Ensure compliance with local codes.
  3. Choose between DIY or professional installation – Consider costs and expertise.
  4. Select essential components – Grill, countertops, storage, and more.
  5. Install utilities and appliances – Electricity, gas, and plumbing.

With the rise in outdoor kitchen popularity, more people are changing their backyards into inviting and practical cooking and entertaining spaces. These culinary havens not only improve the aesthetic appeal of your home but also provide a great venue for social gatherings and family meals. As more individuals take on the rewarding challenge of installing their own outdoor kitchens, they experience the joy of personalizing these spaces to reflect their style and meet their culinary needs.

Whether you prefer a DIY approach or want the assurance of a professional touch, creating an outdoor kitchen involves careful planning and execution. As interest continues to grow, these installations are becoming a key feature in modern backyards, offering both functionality and leisure.

Steps to developing an outdoor kitchen, featuring planning, permits, DIY/professional decision, and component selection - how to install an outdoor kitchen infographic infographic-line-5-steps-colors

Common how to install an outdoor kitchen vocab:
installing an outdoor kitchen
outdoor kitchen plans

Planning Your Outdoor Kitchen

Planning your outdoor kitchen is the first step to creating a space that fits your needs and budget. Here’s what you need to consider:

Space and Layout

Start by evaluating the space you have available. Measure your backyard and decide where the kitchen will best fit. Think about how you’ll use the space. Is it just for cooking, or will it also be a gathering spot for family and friends?

  • Traffic Flow: Ensure there’s enough room for people to move around comfortably.
  • Proximity: Place your kitchen near your dining area for easy access.
  • Accessibility: Make sure essential components like the grill and sink are easy to reach.

Budget Considerations

Building an outdoor kitchen can be costly, but planning helps manage your expenses. Decide how much you’re willing to spend and prioritize key elements like the grill and countertops. DIYing can save you 20%–40% on labor fees, but it requires skill and time.

  • Materials: Choose durable, weather-resistant options.
  • Appliances: Consider what appliances you need and their costs.
  • Extras: Factor in additional features like lighting and seating.

Permits

Before starting construction, check if you need permits. These can include deck, patio, and plumbing permits, which might add $250–$2,000 to your project cost. It’s crucial to comply with local building codes to avoid fines or having to redo work.

Essential Components

An outdoor kitchen isn’t complete without its essential components. Think about what you need to make your kitchen functional and enjoyable.

  • Grill: The centerpiece of your kitchen, available in various sizes and fuel types.
  • Countertops: Choose from materials like granite or concrete for durability.
  • Storage: Cabinets and drawers keep your kitchen organized.
  • Sink: Adds convenience but requires plumbing.

By carefully planning your outdoor kitchen, you’ll create a space that’s both beautiful and functional. Whether you go the DIY route or hire professionals, these steps will help ensure a successful project.

Outdoor kitchen planning - how to install an outdoor kitchen

Next, we’ll dive into the step-by-step outdoor kitchen building process, where we’ll guide you through frame construction, appliance installation, and more.

How to Install an Outdoor Kitchen

DIY Installation

When it comes to installing an outdoor kitchen, the DIY approach can be both rewarding and cost-effective. However, it requires a good amount of skill and patience. Here’s why you might consider this route:

  • Cost Savings: By doing it yourself, you can save 20%–40% on labor costs. This means more of your budget can go toward high-quality materials or additional features.
  • Customization: DIY allows you to tailor every aspect of your kitchen to fit your personal taste and space requirements. Want a unique layout or special features? You can make it happen.
  • Skill Requirements: That a DIY outdoor kitchen is not a beginner project. You’ll need a solid understanding of construction, plumbing, and possibly electrical work. If you’re handy and enjoy a challenge, this could be a great project for you.

Step-by-Step Process for DIY:

  1. Design Your Layout: Start with a detailed plan. Measure your space and sketch your layout, considering the placement of major components like the grill and countertops.
  2. Gather Materials: Choose durable materials that can withstand outdoor conditions. Think stone, stainless steel, or treated wood.
  3. Build the Frame: Use metal studs or treated wood to construct a sturdy frame. Ensure it’s level and secure.
  4. Install Utilities: If your design includes appliances needing electricity or plumbing, consult professionals for safe installation.
  5. Finish with Countertops and Appliances: Once the frame is complete, install countertops and place your grill and other appliances in their designated spots.

Professional Installation

Opting for a professional installation can take the stress out of the process and ensure a high-quality result. Here are the benefits of hiring experts:

  • Quality Workmanship: Professionals have the experience and tools to build a durable, attractive outdoor kitchen. They know how to avoid common pitfalls and ensure everything is up to standard.
  • Adherence to Local Codes: Professionals are familiar with local building codes and permit requirements. This means you won’t have to worry about compliance issues or potential fines.
  • Time Efficiency: While a DIY project can take weeks, professionals can often complete the job in a fraction of the time. This lets you enjoy your new outdoor space sooner.

Construction Costs:

Professional installation does come with higher upfront costs. However, you’re paying for expertise, peace of mind, and a polished finish that might be difficult to achieve on your own. Generally, hiring professionals can add 30%–50% to your overall project cost, depending on the complexity and materials chosen.

In summary, whether you choose to tackle the installation yourself or hire professionals, understanding the process and weighing the pros and cons can help you make the best decision for your needs and budget. Next, we’ll explore the essential components of an outdoor kitchen, including selecting the right grill and countertops.

Essential Components of an Outdoor Kitchen

Designing an outdoor kitchen involves selecting the right components to create a functional and inviting space. Let’s explore the essentials: grill selection and countertop materials.

Grill Selection

The grill is the heart of any outdoor kitchen. Choosing the right one involves considering several factors:

  • Size: Grills come in various sizes, from compact two-burner models to large six-burner setups. Your choice depends on your cooking needs and the space available. For small gatherings, a two-burner grill might suffice, while larger events may require more cooking power.
  • Fuel Type: Decide between propane and natural gas. Propane grills are portable and easy to set up, while natural gas grills offer a continuous fuel supply and might require professional installation for the gas line.
  • Features: Look for features that improve your cooking experience. Side burners are great for preparing side dishes, and rotisserie kits are perfect for roasting. Some grills even come with built-in thermometers and lights for nighttime cooking.

Countertop Materials

Countertops are not just for aesthetics; they must withstand the elements. Here are some popular options:

  • Granite: Known for its durability and elegance, granite is a top choice for outdoor countertops. It resists heat and scratches, making it ideal for outdoor cooking.
  • Concrete: Concrete countertops offer a modern look and can be customized with different colors and finishes. They’re durable but require sealing to prevent staining.
  • Stainless Steel: Stainless steel countertops provide a sleek, industrial look and are easy to clean. They are resistant to rust and corrosion, making them perfect for outdoor use.

Additional Essentials

  • Storage: Ample storage is crucial for keeping your outdoor kitchen organized. Consider cabinets and drawers made from weather-resistant materials to store utensils, dishes, and grilling tools.
  • Sink: An outdoor sink adds convenience, allowing you to wash hands and prep food without running indoors. Ensure proper plumbing is in place, and consider durable materials like stainless steel or stone for the sink.

By carefully choosing these essential components, you can create an outdoor kitchen that’s both functional and stylish, making your backyard the ideal spot for entertaining and enjoying the great outdoors. Next, we’ll guide you through the step-by-step building process, including frame construction and appliance installation.

Step-by-Step Outdoor Kitchen Building Process

Building an outdoor kitchen is an exciting project that can transform your backyard into a culinary oasis. Here’s a simple guide on how to install an outdoor kitchen, focusing on frame construction and appliance installation.

Building the Frame

The frame is the backbone of your outdoor kitchen. It provides the structure and support for all other elements.

1. Choosing Materials:

  • Wood Frame: Ideal for DIY enthusiasts. Use pressure-treated wood to resist moisture and rot. It’s familiar and easy to work with.
  • Metal Studs: More durable and resistant to fire and pests. Requires a chop saw with a metal blade and possibly welding, which can be more challenging for beginners.

2. Construction Steps:

  • Layout and Design: Start with a blueprint. Measure the space and plan where each component will sit, leaving space for appliances.
  • Cutting and Assembling: Cut your vertical studs, footers, and headers to size. Assemble them using a drill and exterior screws for wood or welding for metal. Ensure your frame height accounts for countertop thickness.
  • Leveling: Use a long level to ensure your frame is even on all sides. This is crucial for stability and aesthetics.

Sheathing and Stone Veneer

Once your frame is ready, it’s time to add the outer layers that will give your kitchen its finished look.

1. Sheathing:

  • Use cement board or a similar moisture-resistant material to cover the frame. This acts as a base for your finish materials.

2. Stone Veneer:

  • Choose a stone veneer that matches your home’s exterior or your personal style. Attach it to the sheathing using mortar and a notched trowel. This step adds texture and a polished appearance.

Installing Appliances

With the structure in place, it’s time to add the functional elements that make your outdoor kitchen come alive.

1. Grill Installation:

  • The grill is the centerpiece. Ensure it’s securely in place and aligned with the countertop. Follow manufacturer instructions for any special venting needs.

2. Refrigeration:

  • Install an outdoor-rated refrigerator. This keeps drinks and ingredients cool and accessible. Ensure proper electrical connections and ventilation.

3. Under-Counter Storage:

  • Add cabinets and drawers beneath the countertops. Use materials designed for outdoor use to withstand weather conditions.

By following these steps, you’ll have a solid foundation for your outdoor kitchen. The next phase involves final touches like countertops and finishing materials, which we’ll explore further. This process might seem complex, but with careful planning, your outdoor kitchen will soon be ready for memorable gatherings and delicious meals.

Frequently Asked Questions about Outdoor Kitchens

How much does it cost to install an outdoor kitchen?

The cost to install an outdoor kitchen can vary widely. On average, a professionally built outdoor kitchen might cost anywhere from $12,000 to $20,000. However, if you choose to DIY, you could save between 20% to 40% on labor costs, potentially reducing your expenses by $1,500 to $6,000.

Factors affecting cost include:

  • Size and Complexity: Larger kitchens with more features cost more.
  • Materials: High-end materials like granite or stainless steel increase costs.
  • Appliances: The choice of grill, refrigerator, and other appliances can significantly impact the budget.

Do you need plumbing for an outdoor kitchen?

While not all outdoor kitchens require plumbing, having a sink can greatly improve functionality. A sink allows for easy cleanup and food preparation. If you plan to include a sink or other water-dependent appliances, professional consultation is advisable. A licensed plumber can ensure that water lines are installed correctly and meet local code requirements.

What is the best base for an outdoor kitchen?

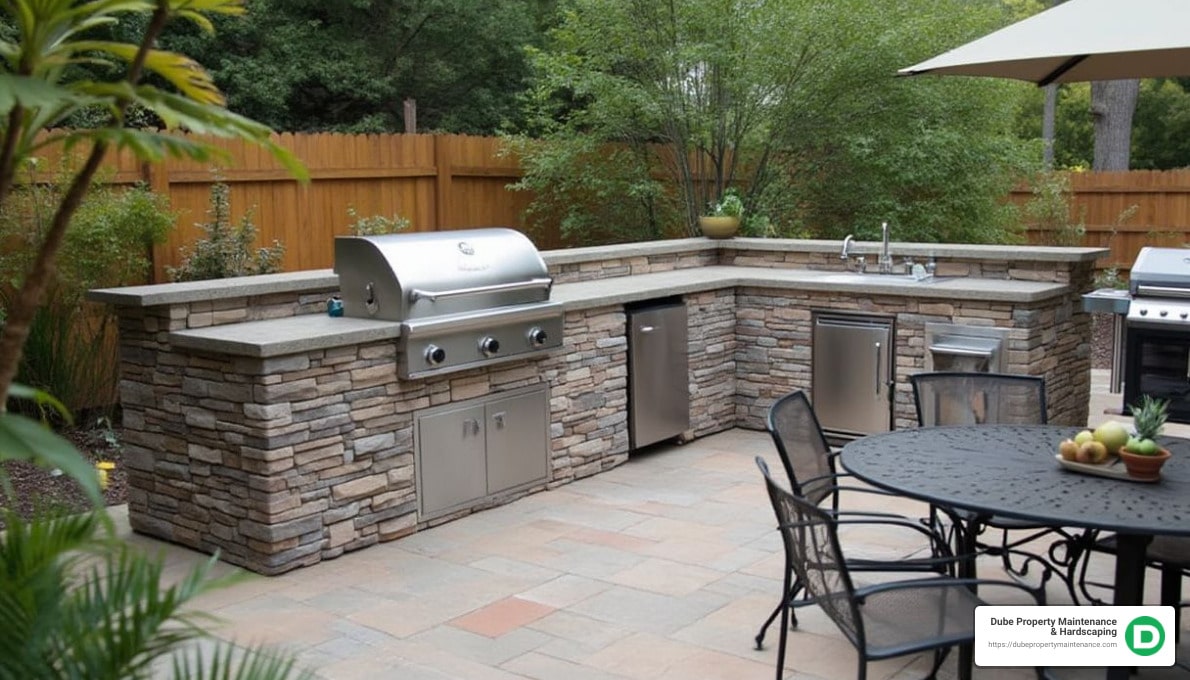
Choosing the right base is crucial for durability and stability. Stone and brick are excellent options for outdoor kitchens. They are both durable and can withstand weather changes.

  • Stone: Provides a natural look and excellent durability. It requires minimal maintenance and can blend seamlessly with many landscape designs.
  • Brick: Offers a classic appearance and strong structural support. It’s a reliable choice for long-lasting outdoor kitchen installations.

Using these materials ensures that your outdoor kitchen base will remain sturdy and visually appealing for years to come.

Conclusion

Changing your backyard into a functional and stylish outdoor kitchen is a rewarding venture. With the right planning and execution, you can create a space that improves your outdoor living experience and adds value to your home. Whether you’re entertaining guests or enjoying a quiet family dinner, an outdoor kitchen offers the perfect setting.

At Dube Property Maintenance & Hardscaping, we specialize in making your outdoor kitchen dreams a reality. Our team of professionals brings years of expertise in landscape installation and hardscaping, ensuring that your project is handled with care and precision. We understand that every homeowner has unique needs and preferences, which is why we offer customized solutions custom to your lifestyle.

Choosing professional services for your outdoor kitchen installation not only guarantees quality workmanship but also ensures that all local codes and regulations are met. Our comprehensive approach covers everything from planning to the final installation, providing you with a seamless experience and peace of mind.

Ready to take the next step in enhancing your outdoor living space? Let us help you create a culinary oasis that you’ll enjoy for years to come. Visit our Outdoor Kitchen Design page to learn more about our services and get started on your project today.

By entrusting your project to Dube Property Maintenance & Hardscaping, you’re investing in a space that will not only improve your home but also enrich your lifestyle. We look forward to working with you to bring your vision to life.


how to install an outdoor kitchen

Table Of Contents

Get Started Today!
Dube Property Maintenance
& Hardscaping
Dube Property Maintenance
160 Hampstead St., Methuen, MA 01844
Servicing Merrimack Valley & Southern NH
For 25+ years Dube Property Maintenance & Hardscaping has provided top-rated residential and commercial landscape design, installations, hardscaping, irrigation systems and commercial snow and ice management. Our hardscaping division proudly serves the Merrimack Valley, Middlesex and Essex County and Southern, NH regions, transforming outdoor spaces into stunning works of art.