Building a retaining wall is a practical solution for homeowners looking to improve their outdoor space both functionally and aesthetically. Whether you’re dealing with hilly landscapes or simply want to create more usable yard space, a retaining wall offers a sturdy fix while also enhancing your garden’s overall appeal.
Before diving into the process, it’s important to understand a few key benefits and considerations:
This guide will walk you through the basics and answer your initial questions, so you can decide if a retaining wall is right for your project.

Simple guide to building a retaining wall:
– how to build a landscape block retaining wall
– interlocking retaining wall blocks
– retaining wall ideas
Before you start building a retaining wall, careful planning is crucial. This stage ensures your project is successful and complies with any necessary regulations. Here’s what you need to consider:
Choosing the right location is the first step. Look for areas where soil erosion is an issue, or where you want to create a level surface. Retaining walls are perfect for sloped landscapes. They can transform a hilly yard into usable space, offering both functionality and aesthetic value.
Every area has its own set of rules and regulations when it comes to construction projects. Before you start, check with your local building department. You may need a permit, especially if your wall will be over a certain height—often around 3 or 4 feet. Some regions have specific requirements for retaining walls, so it’s best to be informed ahead of time.
Safety first! Before you dig, call 811 to locate underground utility lines. This is a free service that ensures you don’t accidentally hit gas, water, or electrical lines. Digging without checking can be dangerous and costly.
Depending on your location, a building permit might be necessary. These permits ensure that your retaining wall meets safety standards. Contact your local building authority to find out what permits you need and how to obtain them. This step can save you from future headaches and fines.
If you live in a community with a Homeowners Association (HOA), check their guidelines. Some HOAs have specific rules about the materials, colors, and heights of retaining walls. Getting approval from your HOA can prevent conflicts and ensure your project aligns with community standards.

By planning carefully, you can avoid common pitfalls and ensure your retaining wall project goes smoothly. Next, we’ll discuss how to choose the right materials and tools for your retaining wall.
When it comes to building a retaining wall, selecting the right materials and tools is essential. Your choices will impact the wall’s durability, appearance, and cost. Here’s a simple guide to help you decide.
Concrete Blocks
Concrete blocks are a popular choice for retaining walls. They are durable, affordable, and come in various shapes and sizes. Their interlocking design makes them easy to stack, providing stability. Concrete blocks can mimic natural stone or have a smooth finish, depending on your style preference.
Pressure-Treated Wood
If you prefer a natural look, pressure-treated wood is a great option. It’s treated to resist rot and insect damage, making it suitable for outdoor use. Wood walls blend well with garden landscapes and offer a warm, rustic charm. However, wood may not last as long as stone or concrete, especially in wet conditions.
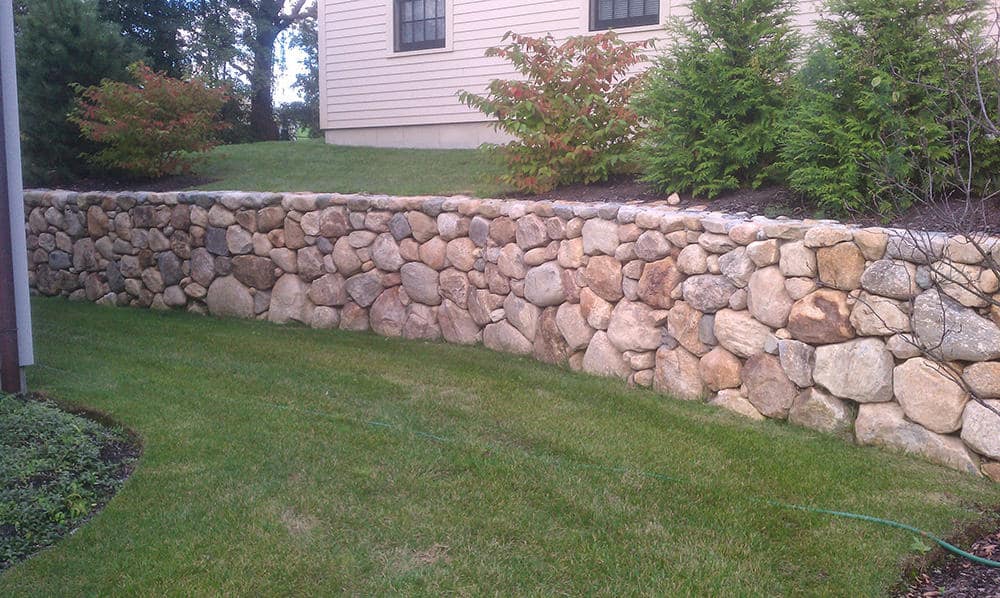
Natural Stone
For a timeless and neat look, consider using natural stone. Options like granite, limestone, or slate provide a unique texture and color. Natural stone walls are highly durable and resistant to weathering. They can be more expensive and require skill to install, but the aesthetic payoff is worth it.
Bricks
Bricks bring a classic and traditional feel to your landscape. They are available in various colors and patterns, allowing for creative designs. Bricks are sturdy and easy to replace if damaged. However, they may shift over time if not properly installed, so careful planning is necessary.
Having the right tools will make your project easier and more efficient. Here’s a basic list to get you started:
By choosing the right materials and tools, you’re setting the stage for a successful retaining wall project. Next, we’ll dive into the step-by-step process of building your wall, starting with site preparation.
Before you start building a retaining wall, preparing the site is crucial. This sets the foundation for a sturdy and long-lasting structure.
Clearing
Begin by clearing the area where the wall will be placed. Remove any plants, rocks, or debris that might interfere with construction. A clean site ensures you can accurately measure and mark the area.
Measuring and Marking
Use a measuring tape to determine the length and width of your retaining wall. Mark the area with ground-marking spray paint or stakes and mason’s line. This will guide your excavation and block placement.
A solid foundation is key to preventing your retaining wall from shifting over time.
Dig a trench for the foundation of your wall. The trench should be deep enough to bury at least half of your first course of blocks plus 3 inches of paver base. Generally, this means a depth of 4 to 8 inches, depending on block size.
Gravel Base
Fill the trench with gravel, which provides a stable base and helps with drainage. Use a hand tamper to compact the gravel, ensuring it’s firm and level. A 4 or 6-foot level can help check for evenness.
The first course sets the tone for the rest of the wall, so precision is important.
Laying the Blocks
Start laying blocks at the lowest point of the trench. Center them on the trench line, and use a level to ensure each block is even. Adjust as needed with a rubber mallet.
Ensuring Level and Adjustments
As you lay each block, check that it’s level both front-to-back and side-to-side. If blocks are too high, tap them down with the mallet. If they’re too low, add more gravel beneath them.
Building up the wall requires careful stacking and attention to detail.
Stacking Blocks
Continue stacking blocks in a staggered pattern for stability. This means the seams of one course should not align with those of the course below.
Backward Slope and Interlocking
As you stack, ensure a slight backward slope into the hill. This helps counteract the pressure from the soil behind the wall. Use interlocking blocks if available, as they add extra stability.
Checking Alignment
Regularly check the alignment of your wall. Use a level and a string line to ensure the wall remains straight and true.
Proper drainage prevents water buildup, which can destabilize your retaining wall.
Drain Tile
Install a drain tile at the base of the wall. This perforated pipe will carry water away from the wall, reducing pressure.
Backfill Material
As you build, backfill the space behind the wall with gravel. This material aids drainage and supports the wall structure.
Perforated Pipe
Place a perforated pipe within the gravel backfill. This pipe should lead to a safe outlet for water, ensuring it doesn’t accumulate behind the wall.
By following these steps, you’ll build a retaining wall that’s not only strong but also improves your landscape. Next, we’ll explore advanced tips and common mistakes to avoid in your project.
When building a retaining wall, understanding the finer details can make all the difference. Here are some advanced tips and common pitfalls to watch out for.
Precision in cutting blocks can greatly improve the stability and appearance of your wall.
Proper block placement is crucial for maintaining the wall’s integrity.
Good drainage is vital to prevent water damage and ensure longevity.
Avoiding common mistakes can save you time and effort.
By focusing on these advanced techniques and avoiding common errors, you can ensure your retaining wall is both beautiful and durable. Next, we’ll discuss how to maintain your retaining wall to keep it in top condition.
Once your retaining wall is built, keeping it in great shape requires regular maintenance. This ensures it remains strong and looks good for years to come. Here’s how to inspect, clean, and repair your wall effectively.
Regular inspections are key to catching issues early.
Keeping your wall clean not only improves its appearance but also prevents damage.
Addressing minor repairs promptly can prevent bigger issues.

By following these steps for inspection, cleaning, and repair, your retaining wall will remain a sturdy and attractive feature of your landscape. Next, we’ll explore the professional services offered by Dube Property Maintenance & Hardscaping to improve your outdoor space even further.
When it comes to enhancing your outdoor space, Dube Property Maintenance & Hardscaping offers top-notch professional services in Methuen, MA. With over 30 years of experience, their team specializes in creating beautiful and functional landscapes that stand out.
Dube Property Maintenance & Hardscaping provides a comprehensive range of services custom to meet your unique landscaping needs.
Based in Methuen, MA, Dube Property Maintenance & Hardscaping serves a wide area, including neighboring communities such as Andover, North Reading, and even parts of Southern New Hampshire. Their commitment to quality and customer satisfaction has made them a trusted partner for homeowners and businesses alike.
Whether you’re looking to build a new retaining wall or need help maintaining your existing landscape, Dube Property Maintenance & Hardscaping has the expertise to provide solutions that are both practical and visually appealing. They use only high-quality materials, ensuring that your investment lasts for years to come.
By choosing Dube Property Maintenance & Hardscaping, you’re not just getting a service; you’re gaining a partner dedicated to making your outdoor spaces a reflection of your vision. Contact them today to discuss how they can help improve your landscape with their professional touch.
Next, we’ll wrap up with a look at future care and ways to further improve your surroundings.
Building a retaining wall is a rewarding project that can transform your outdoor space. By following the steps outlined, you’ve created a structure that not only prevents soil erosion but also adds beauty and functionality to your landscape.
Take a moment to admire your work. You’ve successfully tackled a challenging project and learned valuable skills along the way. Review each section of the wall to ensure everything is in place and aligned correctly. A well-built retaining wall not only looks great but also stands the test of time.
Maintenance is key to keeping your retaining wall in top condition. Regularly inspect the wall for any signs of wear or damage. Clean the surface to prevent moss or algae buildup, which can make the wall slippery and unsightly. If you notice any issues, such as leaning or cracking, address them promptly to avoid more significant problems later.
Your retaining wall is more than just a functional structure; it’s a canvas for creativity. Consider adding plants or flowers along the wall to create a vibrant garden. Use the space to incorporate seating areas or decorative elements like lighting. These improvements not only beautify your space but also make it more inviting and enjoyable.
For those who prefer professional assistance, Dube Property Maintenance & Hardscaping offers expert services to further improve your landscape. With their experience and dedication, they can help you achieve the outdoor oasis of your dreams.
By investing time and effort into building and maintaining your retaining wall, you’ve taken a significant step toward creating a beautiful and functional outdoor environment. Enjoy your new space and all the possibilities it brings!