Block retaining wall construction is one of the most effective ways to control erosion, create usable space, and add lasting value to your property. Whether you’re dealing with a steep slope or want to create terraced garden beds, concrete block walls offer the perfect blend of strength, affordability, and DIY-friendly installation.
Essential steps for block retaining wall construction:
1. Plan and obtain permits (walls over 3-4 feet typically require permits)
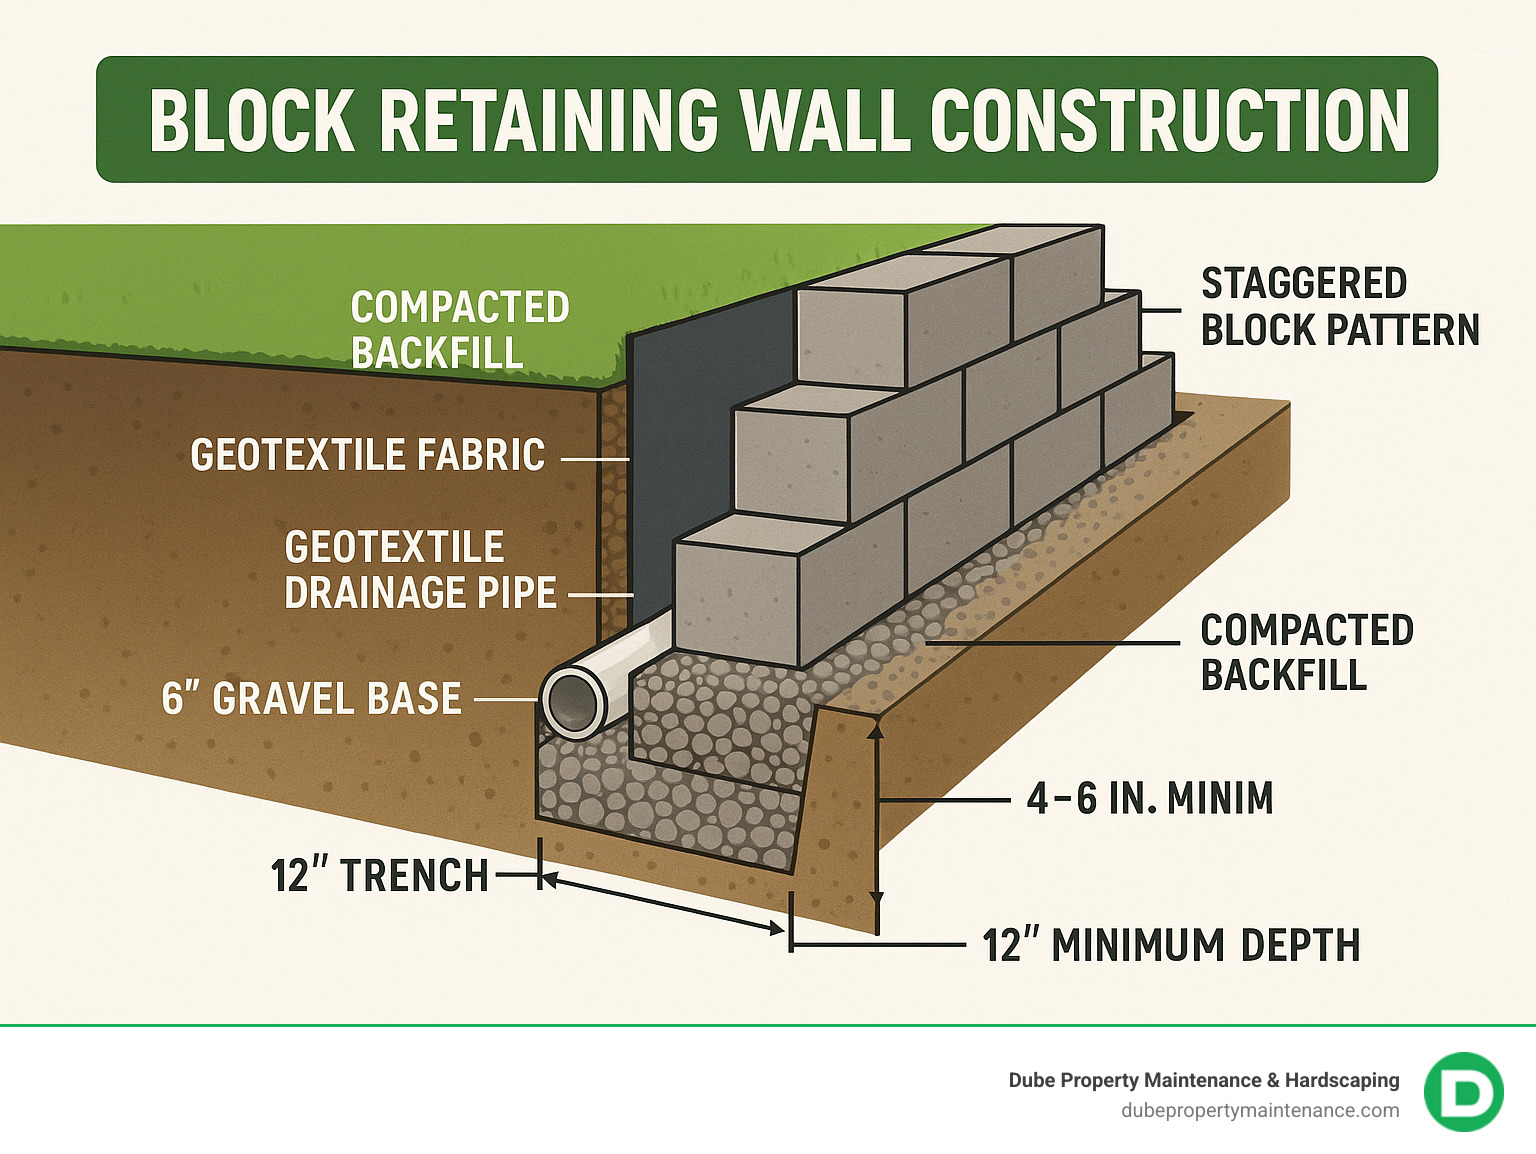
2. Excavate trench – 12+ inches wide, 4-6 inches deep minimum
3. Install gravel base – 6 inches of compacted crushed stone
4. Lay first course – bury halfway for stability
5. Stack additional rows – stagger joints like brickwork
6. Install drainage – perforated pipe and gravel backfill
7. Add capstones – secure with construction adhesive
Block retaining walls can last 50 to 100 years when properly constructed. DIY costs typically range from $1,000 to $2,300 per 100 square feet, making them significantly more affordable than poured concrete alternatives.
The key to success lies in proper foundation preparation and drainage. As one construction expert notes: “Water is the leading cause of retaining wall failure” – which is why proper drainage behind your wall is absolutely critical.
Why choose block construction?
– Easier to install than poured concrete
– No special mixing or curing required
– Interlocking design provides natural stability
– Wide variety of colors and textures available
– Can be built in sections over time
Simple block retaining wall construction glossary:
– backyard designs with retaining walls
– gabion wall builders near me
– stone wall builders near me
Before breaking ground, proper planning is crucial for successful block retaining wall construction. Understanding your wall’s purpose, selecting the right materials, and navigating local codes will save you time, money, and headaches down the road.
Key benefits of concrete block retaining walls:
– Erosion control – Prevents soil washout during heavy rains
– Landscape improvement – Creates usable terraced spaces
– Slope management – Stabilizes steep grades safely
– Aesthetic appeal – Adds architectural interest to your property
– Cost-effectiveness – More affordable than poured concrete or natural stone
Types of concrete blocks for retaining walls:
– Split-faced blocks – Natural stone appearance with textured front
– Traditional cinder blocks – Standard 8″ x 8″ x 16″ concrete blocks
– Interlocking blocks – Feature lips or pins for secure stacking
– Gravity-held blocks – Rely on weight alone for stability
– Pin-system blocks – Use mechanical fasteners for added security

| Material Type | Average Cost per Sq Ft | Installation Difficulty | Expected Lifespan |
|---|---|---|---|
| Concrete Block | $10-$25 | Moderate (DIY-friendly) | 50-100 years |
| Poured Concrete | $15-$45 | High (Professional) | 75+ years |
| Timber | $8-$20 | Low (DIY-friendly) | 15-25 years |
Note: These are average costs based on internet data and not actual costs for Dube Property Maintenance & Hardscaping. Actual costs may vary from $5-$75 per square foot depending on site conditions and complexity.
Essential tools for block retaining wall construction:
– Plate compactor or hand tamper
– 4-foot and 2-foot levels
– Dead-blow hammer or rubber mallet
– Masonry chisel and safety glasses
– Measuring tape and chalk line
– Shovel and wheelbarrow
– Diamond blade saw for cutting blocks
Use our Retaining Wall Block Calculator to estimate materials needed for your project. For design inspiration, check out our Retaining Wall Ideas gallery.
Proper site assessment prevents costly mistakes and ensures your wall performs as intended. Start by evaluating the slope, soil conditions, and any underground utilities before beginning excavation.
Critical site evaluation steps:
1. Survey the slope – Measure the grade and identify the steepest sections
2. Test soil type – Clay retains water while sandy soil drains too quickly
3. Call 811 – Locate underground utilities before digging (it’s free and required by law)
4. Mark the layout – Use stakes and string line for straight walls, garden hose for curves
Understanding soil pressure: Soil weighs over 100 pounds per cubic foot, and when wet, it exerts tremendous pressure against retaining walls. This is why proper drainage and foundation preparation are absolutely critical for long-term success.
Accurate material estimation prevents mid-project delays and cost overruns. Always order 10% extra blocks to account for breakage, cutting waste, and future repairs.
Material quantities for a typical 4-foot high, 20-foot long wall:
– Blocks: 60-80 units (depending on size)
– Gravel base: 2-3 cubic yards of 3/4″ crushed stone
– Backfill gravel: 3-4 cubic yards
– Capstones: 20-25 linear feet
– Geotextile fabric: 100-150 square feet
– Construction adhesive: 2-3 tubes
Budget considerations for DIY projects:
– Materials only: $1,000-$2,300 per 100 square feet
– Tool rental: $100-$200 per day for plate compactor
– Delivery fees: $50-$150 depending on distance
– Permits: $50-$500 (varies by municipality)
Professional installation typically costs $3,000-$18,000 for similar projects, making DIY construction an attractive option for homeowners comfortable with physical work.
Your retaining wall foundation is like the foundation of your house – it’s the one thing you absolutely cannot afford to get wrong. Block retaining wall construction success starts and ends with what’s underground.
The foundation requirements change dramatically based on your wall’s height. For walls under 3 feet, you’ll need a trench that’s 4-6 inches deep with 6 inches of compacted gravel. When you’re building walls 3-4 feet high, bump that up to a 6-8 inch deep trench with 6-8 inches of compacted gravel. Anything over 4 feet requires professional engineering.
Your base trench should be at least 12 inches wide and deep enough to bury your first course of blocks halfway down. So for a typical 4-foot wall, you’re looking at digging 12-14 inches deep to accommodate both your gravel base and those buried blocks.
Compaction is absolutely critical – and this is where many DIY projects go wrong. Loose soil and gravel will settle over time, causing your wall to lean, crack, or worse. A plate compactor isn’t just recommended, it’s essential. Make at least two passes over your entire foundation area.
Water is your wall’s biggest enemy, which is why proper drainage planning starts right here in the foundation stage. For detailed guidance on getting your foundation right from the start, check out our comprehensive guide on Building a Retaining Wall.
Getting your layout perfect before you start digging saves hours of frustration later. Start by marking the front edge with stakes and string line for straight walls. For curved walls, grab a garden hose and lay it out in your desired shape. Once you’re happy with the layout, spray paint the ground following your line.
The excavation area needs to extend well beyond your wall face. Measure and mark the back edge of your dig zone – you’ll need room for your blocks, drainage gravel, and working space. On sloped sites, step your foundation rather than following the ground slope.
During excavation, remove all vegetation and organic material from the wall area. Grass, roots, and topsoil will decompose and settle, creating weak spots in your foundation. Dig your trench 18 inches wide for shorter walls, 24 inches for walls over 4 feet.
Your footing distributes your wall’s weight evenly and prevents settling. The process starts with compacting the trench bottom using at least two passes with your plate compactor. Next, install 6 inches of 3/4″ crushed gravel in the trench. The angular edges of crushed gravel lock together when compacted, creating a rock-solid foundation.
Compact the gravel in 3-inch lifts for maximum density. This means adding 3 inches, compacting it thoroughly, then adding the next 3 inches and compacting again. Once your gravel base is solid, add 1 inch of leveling sand for fine adjustments.
Throughout this process, check level frequently using a 4-foot level and straight board. Any mistakes in your foundation will show up in every course of blocks above it.
For detailed information on proper drainage installation, including pipe sizing and placement, see our guide on Retaining Wall Drainage Pipe installation.
Now comes the exciting part – watching your retaining wall take shape! Block retaining wall construction might seem intimidating at first, but once you get into a rhythm, you’ll be amazed at how quickly the wall grows.
Interlocking lip blocks are the most popular choice for DIY builders because they practically stack themselves. These blocks have a built-in lip that hooks over the course below, creating natural alignment and stability. You can safely stack them 24-36 inches high without additional reinforcement.
Pin-system blocks take security a step further by using mechanical fasteners – essentially giant pins that lock each course to the one below. While they require more work to install, they’re worth considering for taller walls or areas with loose soil.
For beginners, gravity blocks offer the simplest installation. These rectangular blocks rely purely on their weight to stay in place, making them foolproof for smaller walls under 3 feet tall.
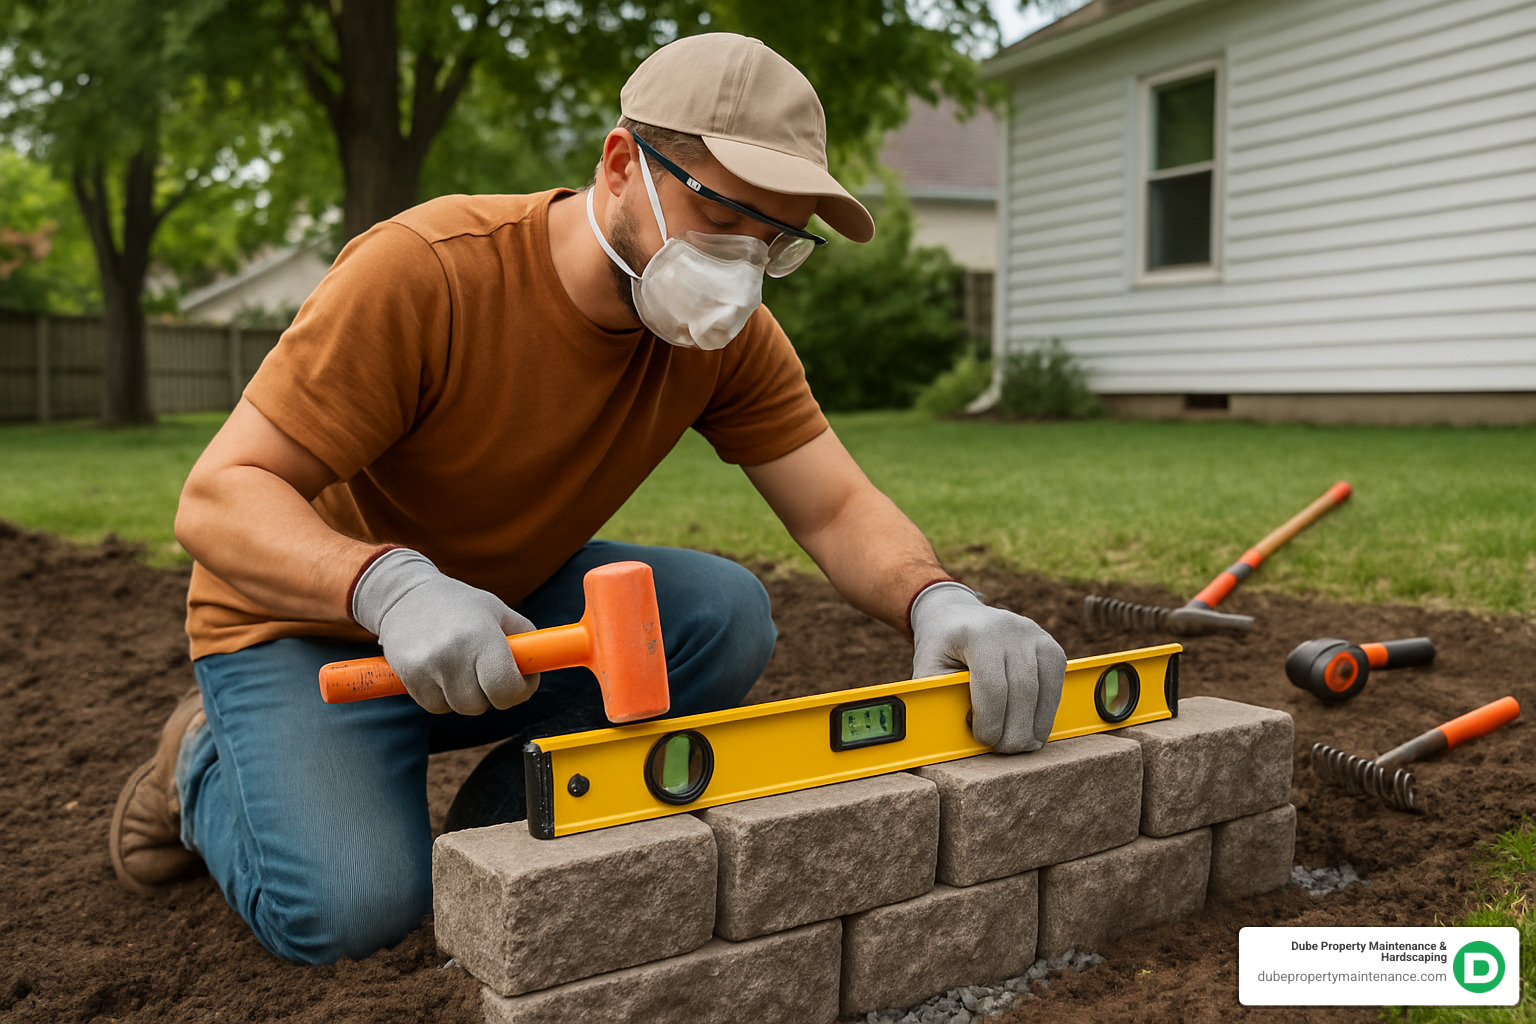
Safety gear isn’t optional when you’re moving heavy blocks and cutting concrete. Safety glasses protect your eyes from chips and debris, while a dust mask is essential when using power tools.
Every course requires the same attention to detail. Stagger your joints like a brick mason would – never line up vertical seams from one course to the next. This running bond pattern distributes weight evenly and prevents weak spots.
Keep your 4-foot level handy and check constantly. Check both front-to-back and side-to-side – your wall should lean slightly back into the hillside but remain perfectly level along its length.
A dead-blow hammer becomes your best friend during construction. Unlike a regular hammer, it won’t chip or crack blocks when you need to make adjustments.
For the upper courses of taller walls, consider using Retaining Wall Block Adhesive on the top 2-3 rows for extra insurance against shifting during freeze-thaw cycles.
The first course determines everything that follows, so measure twice, place once. Any mistakes here will haunt you for the entire project.
Start by removing those interlocking lips from the bottom of your first-course blocks. Use a masonry chisel and hammer, or rent a small grinder if you’re doing a long wall. Those lips prevent the blocks from sitting flat on your carefully prepared base.
Burying blocks halfway into your foundation isn’t just a suggestion – it’s critical for stability. This buried portion acts like an anchor, preventing the entire wall from sliding forward under soil pressure.
The slight backward lean (called “batter” in construction terms) might feel wrong at first. You’re essentially building a wall that leans into the hillside by about 1/4 inch for every foot of height. This backward slope uses gravity to help your wall resist outward pressure from the retained soil.
Level checking becomes almost obsessive during first course installation, and that’s exactly how it should be. Check every 2-3 blocks with your 4-foot level, and don’t be afraid to lift blocks and add or remove sand underneath for fine adjustments.
Once your first course is perfect, the remaining courses follow a predictable rhythm. The running bond pattern is your roadmap for every course. Offset each row by half a block length, creating that classic brick-like appearance.
Dry-fitting each course before final placement saves time and prevents mistakes. Lay out the entire row without setting blocks permanently, checking your stagger pattern and identifying where you’ll need cut blocks.
Starting with half-blocks on alternating courses maintains your running bond pattern. Course one starts with a full block, course two starts with a half-block, course three returns to full blocks, and so on.
String line alignment keeps your wall face perfectly straight over long distances. Stretch a mason’s line along the face of each course, positioned about 1/4 inch out from the block surface.
Geogrid installation becomes critical for walls over 3-4 feet tall. This plastic mesh extends back into your fill material, essentially making the retained soil part of your wall structure. Install geogrid layers every 16-24 inches vertically.
Even the most carefully planned walls need custom-cut blocks, especially at corners, curves, or where your wall meets existing structures.
Hand cutting with a masonry chisel and hammer works well for small adjustments. Score both sides of the block deeply, then place it on a solid surface and strike firmly along the score line.
Angle grinders with diamond blades offer precision and speed for multiple cuts. The key is using the right blade – a masonry diamond blade cuts through concrete like butter. Make several passes rather than trying to cut through in one go.
Wet saws are worth renting for large projects. They reduce dust dramatically and produce incredibly clean cuts. Most rental shops carry 14-inch wet saws that handle standard retaining wall blocks easily.
Safety remains paramount during cutting operations. Concrete dust is seriously harmful to your lungs, so always wear a quality dust mask or respirator. Safety glasses protect against flying chips.
Creating curves requires patience and planning. Cut wedge-shaped pieces to follow your desired radius, starting with gentle curves until you master the technique.
Remember – measure twice, cut once. You can’t un-cut a block that’s too short. Take your time, double-check measurements, and don’t hesitate to practice on a scrap block if you’re attempting a difficult cut.
Here’s the truth about retaining walls: proper drainage separates successful walls from expensive failures. Water is sneaky – it finds every weakness and exploits it until your wall starts leaning, cracking, or worse.
Think of drainage as your wall’s insurance policy. Without it, hydrostatic pressure builds up behind your blocks like a giant water balloon pushing against your wall.
The complete drainage system starts with a 4-inch perforated drain pipe placed behind your first course of blocks. This pipe needs to slope at least 0.5% toward where it exits – that’s about 1/4 inch per foot. Position the holes facing down and surround the pipe with 6 inches of clean gravel on all sides.
Next comes the filter fabric – this prevents soil from clogging up your drainage gravel. We recommend Non-woven filter fabric because it drains better than woven alternatives. For step-by-step installation tips, check out our detailed guide on How to Install Landscape Fabric Behind Retaining Wall.

The backfill process requires patience and attention to detail. Start by filling the hollow cores of your blocks with clean gravel – this adds weight and stability. Then place at least 12 inches of 3/4″ crushed stone directly behind your blocks. This creates a drainage zone that keeps water moving instead of building pressure.
Install your filter fabric to separate the drainage gravel from your soil backfill. When compacting the backfill, work in 6-inch lifts and use light equipment only.
Surface grading is your final defense against water problems. Grade the area behind your wall so water flows over the top rather than pooling behind it.
For taller walls or challenging soil conditions, geogrid reinforcement provides extra stability by essentially making the retained soil part of your wall structure.
Finishing touches transform your functional wall into an attractive landscape feature. Capstones protect the top course from weather while giving your wall a polished appearance. Secure them with construction adhesive and angle them slightly so water runs off rather than pooling in joints.
Joint sealant applied to capstone joints prevents water infiltration and freeze-thaw damage. Choose a high-quality weatherproof sealant that can handle temperature changes without cracking.
Long-term maintenance keeps your block retaining wall construction investment performing for decades. Well-built walls need surprisingly little attention over their 50-100 year lifespan.
Seasonal inspections should focus on drainage outlets – clear any debris that might block water flow. Check annually for signs of settlement or leaning, especially after heavy rains or freeze-thaw cycles. Clean weep holes of leaves and debris that can cause drainage backups.
Reapply joint sealant every 3-5 years to maintain weather protection. Monitor vegetation growth near your wall – while plants can help prevent erosion, roots growing too close can compromise drainage or shift blocks.
The key to successful maintenance is addressing small issues immediately. A minor crack or slight lean that’s ignored can become a major structural problem requiring complete reconstruction.
Cost considerations for maintenance are minimal compared to replacement costs. Regular inspections and minor repairs typically cost under $200 annually, while rebuilding a failed wall can run thousands of dollars.
Your initial investment in proper drainage and quality materials during block retaining wall construction pays dividends through decades of trouble-free performance.
After helping countless homeowners throughout Massachusetts and New Hampshire with their block retaining wall construction projects, we’ve noticed the same questions come up again and again. Let’s tackle the big ones.
Most towns require permits once you hit 36 to 48 inches in height, though every municipality has its own rules. We’ve seen everything from strict 3-foot limits to more relaxed 4-foot allowances.
Here’s what we typically see: walls under 3 feet usually make perfect DIY weekend projects. Once you’re talking 3 to 4 feet, you’re entering permit territory, and geogrid reinforcement becomes your friend. Anything over 4 feet almost always needs official approval, and walls over 6 feet require professional engineering—no exceptions.
Pre-engineered design manuals exist for walls up to 6 feet tall, which can save you thousands compared to custom engineering. Our advice is always the same: call your local building department before you rent the excavator.
Water is the enemy—we can’t say this enough. We’ve seen gorgeous walls that cost thousands of dollars turn into expensive disasters because someone thought regular dirt would work just fine behind the blocks.
Clean, free-draining material is non-negotiable. We always use 3/4″ crushed stone for the first 12 inches directly behind the blocks. This creates a drainage zone that prevents water from building up and pushing against your wall.
After that drainage zone, you can use sandy or gravelly soil for the remaining backfill. The key word here is “sandy”—if you can squeeze it in your hand and it holds together like modeling clay, keep it away from your wall. Clay and topsoil are absolute disasters when used directly against retaining walls.
Think of it this way: crushed stone acts like a French drain system built right into your wall. When it rains, water flows down through the stone and out your drainage pipe instead of building up pressure behind your blocks.
Absolutely! Block retaining wall construction is actually one of the most beginner-friendly hardscaping projects out there. No concrete mixing, no complicated forms, and if you mess up a block, you just pick it up and try again.
That said, let’s be realistic about what you’re signing up for. These blocks typically weigh 30 to 80 pounds each, and you’ll be moving hundreds of them by the time you’re done. Plan on spending 2 to 3 solid weekends for a typical residential wall.
The physical demands are manageable if you pace yourself and use proper lifting techniques. What trips up most DIYers isn’t the block laying—it’s the foundation prep and drainage details. Renting a plate compactor is usually essential unless you’re building something tiny.
We always tell people to stay under 4 feet for their first project. It keeps you out of permit territory and gives you room to learn without major consequences. Plus, shorter walls are much more forgiving if your foundation isn’t absolutely perfect.
When should you call in the pros? If you’re dealing with walls over 4 feet, terrible soil conditions, or slopes steeper than 30 degrees, it’s probably time to make that phone call. Same goes if your wall needs to be anywhere near utilities or existing structures.
Building your own block retaining wall is genuinely rewarding work. There’s something satisfying about stepping back and seeing a solid, straight wall that you built with your own hands. The techniques aren’t rocket science, but they do require attention to detail and a healthy respect for the physical demands.
A properly built wall will outlast most of us—we’re talking 50 to 100 years of service when done right. That’s a pretty good return on a few weekends of hard work.
At Dube Property Maintenance & Hardscaping, we’ve been perfecting block retaining wall construction throughout the greater Boston area and southern New Hampshire for years. Whether you need a quick consultation to get your DIY project on track or want us to handle the whole job from start to finish, we bring the same attention to detail to every project.
Ready to get started? Check out our Block Retaining Wall services or contact our team to talk through your specific project. We’re always happy to help you figure out the best approach for your property and budget.
